In the above picture, the clamped wood strips were to simply limit the forward movement of the platform as I slid it back and forth. I would place coins on the platform and move the platform testing to see if they fell and crept forward as I felt they should. And in the below picture I was noting the both the forward and back positions.
Feeling good about the platform, it was time to build the motor part and the bridge that would hold it.
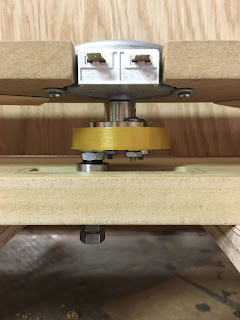
Building on my earlier Push Platform Mock-up, I decided to redesign the doohickey that attaches to the motor and move the platform. Here is what I had for the mock-up:
That design worked fine but I was concerned about its long term durability. I decided to 3D print an improved version. First the was design work:
Here is the printed item:
And the assembly:
The little back rubber gaskets provide enough spacing between either end's bearing and the washer next to it allowing free spin.
Here is the Mock-Up:
Using the same bridge top board, that the motor is attached to, I replaced the old doohicky with the new doohickey and proceeded to use it to determine the proper size, spacing, and position of the new bridge top board.
Time to cut out the new bridge top board. Other than size, there is one thing different than the mock-up board - I decided to put the wire connectors to the side instead of towards the back. This moves them out of the way, less apt to be hit or caught on when I am working inside the cabinet.
During the mock-up test of the platform I found that super slick drawer tape would be a great addition so I added some to this platform not only on the bottom but also the sides.
This ended the push platform work for now. It was enough done and time to focus on the coin drop backboard.


No comments:
Post a Comment